Salamu Alaykum All,
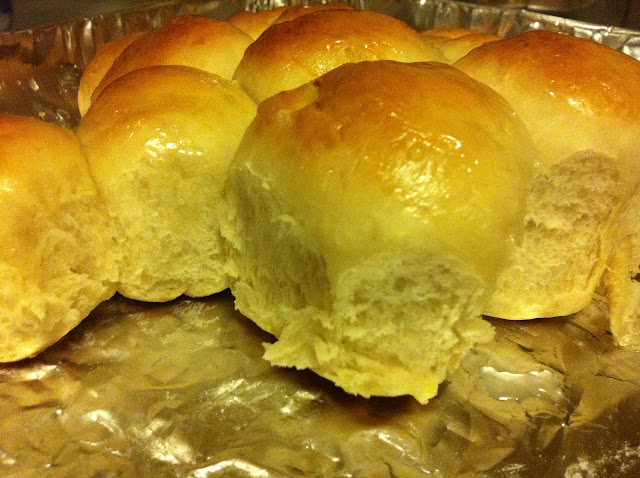
This weekend i tried making something that i've always wanted to try.. Khaliat nahal. This literally means Bee's Hive in Arabic. This is because the buns are baked close to each other in a round pan in a honeycomb like pattern. Thanks to a dear friend a finally got the recipe. My first try was a success, my family finished the whole pan in a day!
It's very easy to make i'll post the recipe below!..
- 3½ cups all-purpose flour
- 4 spoons of sugar (you can add more if you would like the bread to be sweeter)
- 1½ spoons of instant yeast (make sure it's INSTANT/QUICK yeast)
- ½ tsp salt
- 1 1/2 cup of water (might use less)
- 1 egg
- 4 tbsp oil (I use canola oil)
- 4 tbsp melted butter
Glaze:
- 1/2 cup sugar
- 1/2 cup water
Let it reduce until you get a thick consistency.
You will also need:
- One box of Philadaphea cream cheese, cut the cheese into small cubes.
- 1 beaten egg for eggwash before baking
Directions:
1) Add together the dry ingredients (flour, sugar, and salt.)
2) Soak yeast in slightly warm water, about 1/4 of a cup and wait till it bubbles and doubles in size. (this is important).
1) Add together the dry ingredients (flour, sugar, and salt.)
2) Soak yeast in slightly warm water, about 1/4 of a cup and wait till it bubbles and doubles in size. (this is important).
3) Then add the oil, yeast, melted butter and the egg to the dry ingredients and mix together.
4) Start kneading together and gradually add the warm water a little at a time. You might not need it all, so add it sparingly until your dough is nice and soft. Knead for a good 8-10 minutes. The more you knead it the softer the buns will be.
5) Touch a bit of oil with your fingertips and apply all over the ball of dough. Cover in a bowl (not airtight) and set aside for 40mins to an hour for it to double in size. The oven (switched off) is a good place for the dough to rise as it is free from draft and a bit warmer than room temperature..
6) Once it has doubled in size, break off tiny bits of dough. You should get about 30 tiny pieces out of this, depending on the size you want. Take each piece of dough, and stretch it out with your fingers, then add a small piece of cheese in its center. Bring the edges together and form a ball so that the cheese is completely enclosed within the dough. Repeat this with all the dough.
7) Grease your pan/pans with butter/oil and sprinkle some flour. This ensures that the buns come out easily after baking.
8) Place the balls of dough in a 'honeycomb' pattern in the pan. Try to get them close to each other so that there are no or very little spaces in between. When they bake , the balls will expand and the spaces between them will be filled so that the entire bread comes out in one piece (like a cake).
9) Now apply egg wash on the balls.
10) Preheat your oven to 250 C and bake for about 25-30 minutes, or until the bread is nice and golden on top.
10) Preheat your oven to 250 C and bake for about 25-30 minutes, or until the bread is nice and golden on top.
9) Once you remove it from the oven, pour the cooled glaze over the bread as you desire. Some people like alot, some like a little. Personally i prefer to just brush just a little on top.
I took some pics... Enjoy!
If you have any questions please post below.


0 comments:
Post a Comment